⚡ Quick Answer: What is Headstand Yoga (Sirsasana)? Headstand yoga (Sirsasana) is a yoga inversion where the body is balanced upside down with the weight supported on the forearms and crown of the head. Known as the King of all Yoga Poses, it builds core strength, improves circulation, calms the nervous system, and develops mental focus. With proper technique and consistent preparation, most practitioners can achieve a safe, stable headstand within 30-90 days of dedicated practice.
There are certain moments in a yoga practice that just stick with you. The first time you hold Warrior III without wobbling. The first time Crow Pose clicks and your feet actually leave the floor. And then there’s the first time you find yourself upside down in a headstand — steady, calm, breathing — and everything goes quiet.
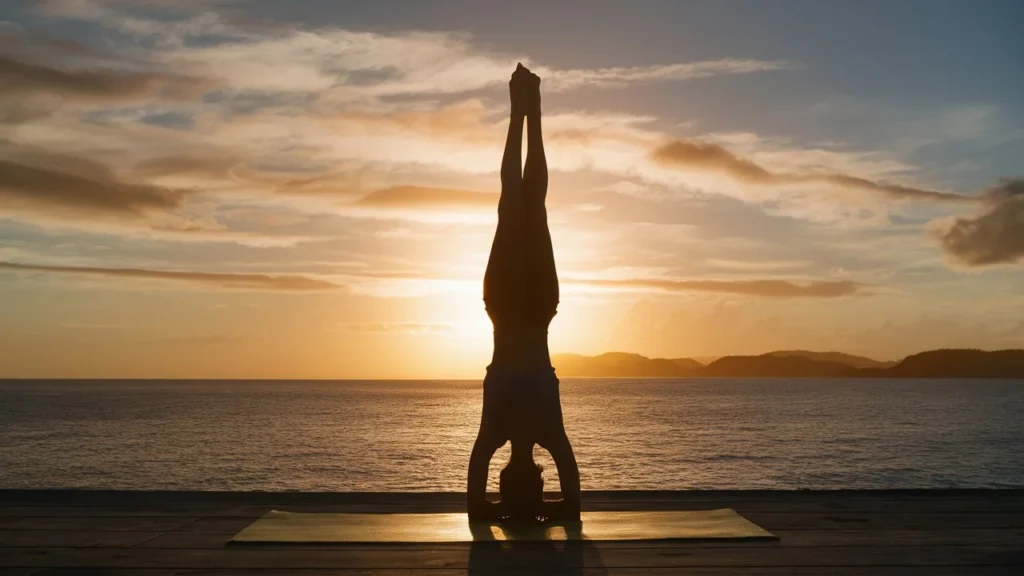
Headstand yoga has that effect on people. It’s one of those poses that looks intimidating from the outside but feels almost meditative once you’re actually in it. The world looks different from upside down. Quite literally.
Sirsasana — the Sanskrit name for headstand pose — has been practiced for thousands of years and is considered one of the most powerful poses in all of yoga. In the Hatha Yoga tradition, it is called Sirshasana or the King of all Asanas, sitting at the top of the hierarchy for the physical, mental, and energetic benefits it delivers.
This guide covers everything you need to know: what headstand yoga actually is, the real science-backed benefits, a step-by-step method that keeps you safe, the most common mistakes practitioners make, who should avoid this pose, and beginner modifications to get you started today — regardless of your current level.
What is Headstand Yoga (Sirsasana)?
Headstand yoga is a supported inversion where the body is held vertically with the head down, forearms on the mat, and legs extended upward toward the ceiling. Unlike a gymnastic headstand where most weight goes through the head and neck, the yoga headstand distributes the majority of weight through the forearms and elbows — making it significantly safer when done correctly.
In classical yoga texts including the Hatha Yoga Pradipika, Sirsasana is described as the ruler of all asanas. This isn’t hyperbole — the pose activates virtually every muscle group in the body simultaneously while fundamentally changing how blood and energy flow through your system.
There are several variations of headstand in yoga:
- Supported Headstand (Salamba Sirsasana) — the most common version, with forearms on the mat and fingers interlaced
- Tripod Headstand (Mukta Hasta Sirsasana) — hands flat on the mat, forming a triangle with the head
- Bound Headstand — arms bound or wrapped, more advanced variation
- Headstand Scorpion (Vrischikasana II) — an extreme advanced variation with deep backbend
For this guide, we focus on Salamba Sirsasana — the supported version — which is the correct starting point for almost all practitioners.(1)
10 Proven Health Benefits of Headstand Yoga (Sirsasana)
Many people don’t do a headstand (Sirsasana) just because they feel they can’t do it. but it’s not like that. You can do it easily with little effort. There are many benefits to us by doing this. Whether you do the headstand with the support of a wall or without any support, but do it daily. Let us know about the benefits of this.
1. Relieves Stress and Anxiety with Headstand Yoga
Being stressed is common these days. Yoga can be used to overcome this. According to this research paper, yoga was used to control stress and high blood pressure. Sirsasana was also given a place in these yoga asanas, which showed positive results. Shirshasana helps to calm the body and mind. This can relieve stress. Therefore, the benefits of a headstand may include relieving stress.
2. Help Treat Asthma
The main role of breathing is considered in yoga. Therefore, doing yoga can be considered good to overcome any problem related to respiratory function. At the same time, asthma is a problem related to respiratory function. Due to this shortness of breath starts. In such a situation, the condition of asthma can be improved by doing a headstand. For now, more scientific research is needed in this regard.
3. Improves Digestion
To keep the stomach healthy, it is necessary for the digestive system to work properly. In such a situation, the help of a headstand can be taken to improve the digestion process. Physical activity through this asana can help digest the diet (2). By doing a headstand, the flow of blood in the body improves, the effect of which can also be seen in the digestive system. Thus, the benefits of a headstand also include a better digestive system.
4. Supports Mental Health and Relieves Depression
Mood can be improved through yoga. As mentioned above in the article, doing a headstand(Sirsasana) can increase blood circulation in the brain. This can help in getting out of depression. Therefore, yoga can be considered a good treatment for depression.
5. Prevents Hair Loss and Promotes Hair Health
If Sirsasana is done regularly for many days, then hair fall can be stopped. By the practice of this asana, the flow of blood in the brain becomes very easy. It also makes the scalp strong and healthy, due to which you get rid of hair-related problems like hair fall, graying of hair, dandruff, etc. It also helps in making hair thick and long.
6. Enhances Facial Glow
Sirsasana is exceptionally valuable in improving the excellence of the face. With its training, the blood supply begins in your face appropriately, and simultaneously, the progression of supplements and mineral salts likewise begins getting right. it shields you from pimples, wrinkles, and other facial issues.
7. Boosts Brain Function and Mental Clarity
Sirsasana is a very good yoga exercise for the brain. With this posture, millions of cells of the brain get a new life, because along with the proper flow of blood in every cell, proper nutrition and mineral salts are available. In this way, these cells and tissue are properly taken care of.
8. Beneficial For Bone Health
By doing a headstand, your bones become strong, so that you stay away from diseases like osteoporosis. That’s why Sirsasana has done at a young age helps to protect you from osteoporosis in old age.
9. Improves Mood and Reduces Anxiety
By doing a headstand(Sirsasana), the blood flow to your brain increases greatly, which gives you a lot of peace and your stress goes away. By doing this asana, there is a significant reduction in the production of cortisol hormone, which gives you relief from problems like anxiety.
10. Enhances Balance and Coordination
Apart from making your body strong, a headstand also enhances your ability to balance. When you save yourself from repeated falls, it develops your ability to balance.
⚠️ Important Safety Note Headstand yoga is NOT suitable for everyone. Do NOT practice Sirsasana if you have: high blood pressure (uncontrolled), glaucoma or other eye pressure conditions, neck injuries or cervical spine issues, recent head or brain surgery, active ear infection, pregnancy (unless you have an established pre-pregnancy headstand practice), or if you are menstruating (traditional yoga recommends avoiding inversions during menstruation — discuss with your teacher). Always consult your doctor before starting headstand practice if you have any medical conditions.
Before You Try Headstand Yoga: Essential Preparation
One of the biggest mistakes people make with headstand yoga is trying to jump straight into the full pose without building the necessary strength and body awareness first. This is how neck injuries happen. The good news is that the preparation work is meaningful practice in itself — not just a stepping stone.
Prerequisites for Headstand Yoga
Before attempting Sirsasana, you should be able to:
- Hold Dolphin Pose (forearm plank with hips raised) comfortably for 60+ seconds
- Maintain a strong Plank Pose for 60+ seconds without your hips sagging
- Practice Downward Facing Dog with straight arms, open shoulders, and long spine
- Do Shoulder Press or Forearm Balance comfortably at the wall
- Feel comfortable with your hips above your head (even in a Downward Dog)
If any of these feel very challenging, spend 2-4 weeks building those first. Your headstand will be safer and you’ll reach it faster by doing this prep work properly.
Daily Warm-Up Routine Before Headstand Practice
- Child’s Pose — rest for 5 breaths
- Neck circles and gentle neck stretches — 2 minutes
- Wrist and forearm warm-up — circles, flexion, extension — 2 minutes
- Cat-Cow spinal mobilization — 10 rounds
- Downward Facing Dog — hold for 10 breaths
- Dolphin Pose — 3 rounds of 30-60 seconds
How to Do Headstand Yoga: Step-by-Step Guide
Take your time with each step. There is genuinely no rush here. A headstand you arrive at in 3 months of careful preparation is far better — and safer — than one you force in 3 weeks.
Stage 1: Setting Up Your Foundation
- Come to your knees and place your forearms on the mat, shoulder-width apart. Your elbows should be directly under your shoulders — not wider, not narrower. This is critical.
- Interlace your fingers gently, creating a basket shape with your hands. Your little fingers should be resting on the mat, not sticking up.
- The crown of your head — the very top, not your forehead or the back — rests on the mat inside your cupped hands. Your hands cradle the back of your head. Check this carefully. Many injuries happen because people put weight on the wrong part of the head.
- Once placed, press firmly through your forearms and think of lifting weight up and out of your head. You want approximately 80% of your weight in your forearms and only 20% in your head.
Stage 2: Building the Inverted V (The Safest Progression)
- From your foundation position, tuck your toes and lift your hips — exactly like going into Downward Dog from forearms (Dolphin Pose).
- Walk your feet toward your elbows until your hips are stacked directly over your shoulders. This is the key alignment check: hips over shoulders, not hips over the middle of your body.
- Hold this position — what some teachers call ‘L-Shape’ or ‘Half Headstand’ — and breathe. This alone is excellent preparation. Hold for 5-10 breaths.
- Practice this stage for 2-3 weeks before moving on if you’re new to the pose.
Stage 3: Lifting Into the Full Headstand Yoga Pose
- From your inverted V with hips stacked over shoulders, bend one knee and draw it toward your chest — keep your other foot on the floor.
- Pause here. Feel your weight distribution. Make small adjustments — press more into your forearms if needed.
- Slowly bring the second knee to meet the first. You are now in a tucked headstand — knees at chest, weight in forearms.
- Pause and breathe. Many practitioners stay here for weeks, and that is perfectly correct. A tucked headstand is a real headstand.
- When you feel stable, begin to slowly extend your legs upward — first to a 45-degree angle, then toward vertical.
- Squeeze your inner thighs together, point your toes or flex your feet (both are fine), and reach actively upward through your heels.
- Breathe slowly. Gaze toward a spot on the floor between your hands. Hold for 5-10 breaths initially, building over time.
Stage 4: Coming Down Safely
- Never fall or collapse out of headstand yoga — always come down with control.
- Bend your knees back to the tucked position first.
- Slowly lower one foot to the floor, then the other.
- Rest immediately in Child’s Pose for at least 5-10 breaths. This is not optional — it allows blood pressure to normalize gradually.
| ⚠️ Important Safety Note Always practice headstand yoga near a wall until you are completely confident in the pose. There is no ego in using a wall — it’s simply safe practice. Place the wall 6-8 inches behind your heels, not right against it, so you develop genuine balance rather than leaning on the wall constantly. |
Headstand Yoga Modifications for Beginners
Modification 1: Headstand Yoga Against the Wall
This is where almost everyone should start. Set up your foundation 6-8 inches from a wall, go through the stages above, and allow your heels to lightly touch the wall when you extend up. The wall catches you — you never actually lean on it. Most practitioners spend 4-8 weeks with the wall before moving to freestanding practice.
Modification 2: Tucked Headstand Only
There is absolutely no requirement to extend your legs in headstand yoga. A tucked headstand — knees drawn to chest while inverted — delivers almost all the same benefits and is much easier to control. Many practitioners with shoulder or neck sensitivity stay in the tucked version permanently. This is a complete, valid practice.
Modification 3: Legs-Up-The-Wall Pose (Viparita Karani)
If headstand yoga is not accessible yet, Legs-Up-The-Wall is a wonderful restorative inversion that provides many similar circulatory and calming benefits with almost no risk. Simply lie on your back and rest your legs vertically against a wall. Stay for 5-10 minutes. It is genuinely beneficial as a standalone practice.
Modification 4: Dolphin Pose as Daily Practice
If you’re working toward headstand yoga but not quite there yet, making Dolphin Pose (forearm plank with hips raised) your daily inversion practice is the single best thing you can do. It builds exactly the shoulder strength, forearm endurance, and comfort with being partially inverted that headstand requires. Aim for 3 rounds of 45-60 seconds daily.
7 Common Headstand Yoga Mistakes to Avoid
- Putting Too Much Weight on the Head: This is the most dangerous mistake in headstand yoga. If your neck is bearing significant weight, your foundation is wrong. Press through your forearms and think of lifting out of your head, not sinking into it.
- Jumping Into the Pose: Flinging your legs up and hoping for the best is how injuries happen. Every stage of getting into headstand yoga should be slow and controlled. If you can’t control the entry, you can’t control the pose.
- Elbows Too Wide: When your elbows splay wider than your shoulders, your base of support collapses. Check your elbows every single time before lifting into the pose.
- Head in the Wrong Place: The crown of the head — the very top — contacts the mat, not the forehead. Many beginners naturally want to put their forehead down, which compresses the neck. Find the crown and practice placing it there consistently.
- Forgetting to Breathe: Headstand yoga should be practiced with smooth, steady breath. If you’re holding your breath, your nervous system is in panic mode. Come down, rest, and try again when you can breathe normally throughout.
- Skipping Child’s Pose Afterward: The transition from being inverted back to upright needs to be gradual. Going straight from headstand to standing can cause a blood pressure drop that makes you dizzy. Child’s Pose for at least 5 breaths after every headstand practice is non-negotiable.
- Practicing Too Long Too Soon: Your first headstand holds should be 5-10 seconds, not 5 minutes. Build duration slowly over weeks. Rushing duration before you’ve established true stability creates compensations that lead to injury.
Expert Tips to Progress in Headstand Yoga
- Practice your headstand at the beginning of your yoga session — before your arms fatigue
- Find a teacher at least twice — in-person feedback on your head and elbow placement is invaluable
- Film yourself from the side — you’ll immediately see if your hips are actually over your shoulders or not
- Shoulder strength is 70% of headstand success — prioritize Dolphin and Plank variations daily
- If you feel any neck pain at all, come down immediately and recheck your setup
- A freestanding headstand can take 2 weeks or 6 months depending on your foundation — both are normal
- Consistency beats frequency — 10 minutes of headstand prep daily beats one 60-minute session per week
Your 30-Day Headstand Yoga Practice Plan
Week 1-2 (Days 1-14): Foundation Building
- Daily: Neck warm-ups, wrist circles, Dolphin Pose x3 rounds of 45 seconds
- Practice Stage 1 and 2 (setup + inverted V/Dolphin) every day at the wall
- Goal: Comfortable inverted V with hips stacked over shoulders for 10 breaths
Week 3 (Days 15-21): Introducing the Tuck
- Add Stage 3 — lift one knee, then both knees to tucked position
- Hold the tuck for 5-15 seconds, focusing on weight in forearms
- Rest in Child’s Pose after every attempt
Week 4 (Days 22-30): Building the Full Pose
- Begin slowly extending legs from the tuck position
- Focus on alignment: forearms, shoulders, hips, heels in one vertical line
- Hold the full pose for 5-15 seconds and build from there
- Celebrate every small win — even a 3-second freestanding headstand is a genuine achievement
Conclusion
Headstand Yoga (Sirsasana) is an intensely engaging and unique pose that boosts both the mind and the body in various ways. Sirsasana strengthens your core, improves circulation, boosts mental focus, relieves stress and much more. Integrating this pose into your routine can elevate your yoga practice. Like everything else, using the right mindfulness, patience, and alignment will help you reap all the benefits and rewards this pose offers.
Incorporating Headstand Yoga (or Sirsasana) to your daily routine and practice will improve your balance and flexibility along with mental clarity. For some, it will restore feelings of physical and emotional wellness. For others it may deepen their practice, zest, and truly calm the mind. Sirsasana should be practiced daily for maximum benefit. Also, the benefits of yoga will be available only if you do it regularly. Hope that the information given in this article will prove useful to you.
FAQ
Q1. What Are the Health Benefits of Headstand Yoga?
Ans: Headstand Yoga improves circulation, strengthens the core and upper body, enhances flexibility, relieves stress, and stimulates the endocrine system. It also boosts brain function by increasing oxygen flow to the brain, leading to better focus and clarity.
Q2. How Long Should You Hold a Headstand?
Ans: Start by holding the headstand for 10-15 seconds and gradually increase the duration as you build strength and balance. With regular practice, you may work up to holding the pose for 1-2 minutes or longer.
Q3. Is Headstand Yoga Safe for Beginners?
Ans: Yes, with proper technique and practice, Sirsasana can be safe for beginners. It’s important to warm up your body, use props like wall support, and practice gradually. Listening to your body and avoiding rushing into the pose is key.
Q4. What Are the Common Mistakes to Avoid in Headstand Yoga?
Ans: Common mistakes include placing too much weight on the head, arching the back excessively, or misaligning the body. Ensure your core is engaged, and avoid placing pressure on your neck.
Q5. Can Headstand Yoga Help with Anxiety and Stress?
Ans: Yes, Headstand Yoga can help reduce stress and anxiety by activating the parasympathetic nervous system, which promotes relaxation. The pose also encourages deep breathing and mindfulness, contributing to emotional well-being.
Q6. How Often Should I Practice Headstand Yoga?
Ans: For beginners, practicing Sirsasana 2-3 times per week is ideal. Over time, as you gain strength and confidence, you can practice more frequently, but always listen to your body and avoid overexertion.


Pingback: Hard Yoga Poses – No One Can Do it Easily.